News / Upcycle
Rustic DIY Photo Collage
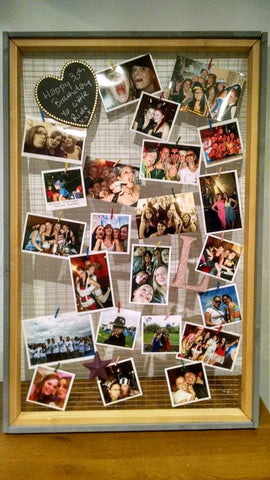
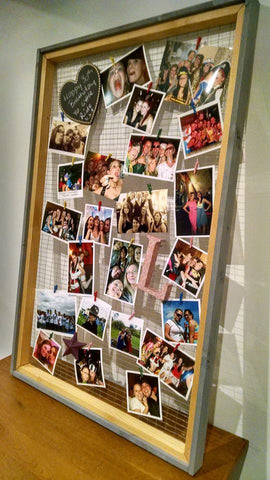
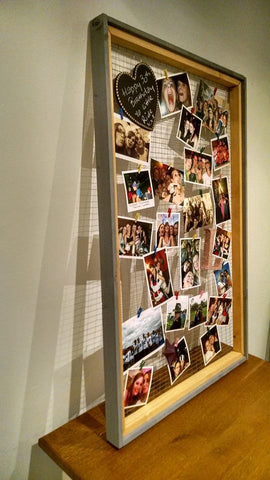
There's nothing more personal than a photo collage gift. This frame was handmade for a good friends birthday using pine which has been stained grey, with some chicken wire added for that real rustic look. Tiny pegs keep the photos in place, with wooden L initial (for Laura), mini heart blackboard and purple painted star for added personalisation. These make great personal gifts and can be made to order with custom sizes, can even be used as a noticeboard. Please pm for more details.


DIY Teddies - by this little boy...
This little guy is truly amazing. His name is Campbell and he makes teddy bears for sick kids in hospital. What an incredible little human, so thoughtful and creative. He taught himself to sew and uses scraps of fabrics to make each one unique. The world needs more people like Campbell.
Decoupage Butterfly Chair
I had done a similar chair before in a Superhero theme, turned out great and sold very early on at the first market it went to! So I had to do one for the girls, or the boys too if they like butterflies, hey we're inclusive here! :)
Decoupage is a process of layering a pva/water mix and usually napkins to stick the image to the furniture/bottle/plant pot - pretty much anything! That is why I love it, its a simple way to give something a new lease of life - and for the price of a napkin, can't get much cheaper than that! Now I have simplified the process, and it actually takes some time, patience and practice of course to get the best results.
This is the perfect statement, study, occasional or dressing table chair. Very unique, sure to make a statement. Priced at €70 and available for collection - local delivery may be possible for a small fee. Please get in touch for more details.


Handmade Fairy Houses
Magical handmade fairy houses now at The Makery.
Each little house is unique and upcycled from an old jar into something really special. Handcrafted using polymar clay and a lot of imagination, just waiting for your fairy to move in ![]()
You can even pop a candle in too, looks fab lit up, for kids of all ages!
Can be made in all shapes, sizes and colours please get in touch for more details.


One man's trash is another man's treasure...
I love it when the sun shines, its my chance to work outside, which let's face it, rarely happens in Ireland!
I managed to get my hands on some old beer kegs from a local pub. The kegs had been damaged slightly where the tap fits and so the suppliers would not take them back as they were unusable for them - that is where I say yes please!! :)
These kegs have gone through a complete transformation...
First things first, they needed to be emptied of any remaining liquid - which is not as fun as it sounds and involved using a crowbar and brute force, which resulted in my clothes and dining room window being covered in beer as it sprayed from the top! That was my lesson learned that day! They then needed to be prepped before attempting any sort of painting, so they were washed down with sugarsoap with any rust spots sanded down and treated pre-spraying.
Next came the spray paint. I work with spray paint a lot so am used to the varying brands and the finish they produce. If using for the first time, I would suggest doing a tester on a scrap of wood/metal or whatever you plan on spraying to get to grips with the distance you need to hold the can away, how fast and how much paint comes out, coverage, drying times etc. Always remember with spray paint that less is more, you can always add another coat, but you cannot go backwards in the process! If you spray too much paint or too closely, the paint will run and leave streaks and ruin your project. Using small burst sprays I find works best as you have much more control over the coverage this way. I decided to use a matt black spray paint for the Guinness keg (I love matt black, gives a lovely depth and texture when used) with a high shine gloss green for the Heineken as I wanted to stick with the brand colours.
After a couple of coats of spray paint with some touch ups, next came the most painstaking stage which was to pick out the lettering with white gloss paint by hand. This took 3-4 coats on each keg, a lot of patience an incredibly steady hand to complete!
Then on to the seat pads! I wanted the seats to be able to be used indoors and outdoors so the seat pad needed to be removable. I sourced some mdf, foam and some cream leatherette to make the pads. I picked cream as I wanted the Guinness keg to look like a pint when finished. Out came the jigsaw to cut the circles from the mdf. The jigsaw was and recent and much loved gift! Who doesn't like a girl with power tools?! :)
After cutting out the mdf the foam was attached and the leatherette cut to size. I wanted the seat pads to be fully removeable and so had to think about how that would work...I measured out the distance needed under the mdf circle to allow the tabs to fit through the handles and be held in place. I then cut and hand sowed some tabs to the to the leatherette that would then be fed through the keg handles and affixed to the mdf underneath. The leatherette was then stapled down all around both foam/mdf circles ensuring the tabs were in the correct position. I then fixed a leatherette circle to the bottom of the mdf circle to tidy up the underneath and hide the staples.
And voila! The perfect addition to any garden or home bar! Now let's just hope we get the weather this summer to use them, we can but hope!
#LookAtThingsDifferently
Beer Kegs Before:
Beer Kegs After:


Pallets, Pallet, Pallets!
I ![]() pallets! Just a couple of examples of many many uses for them. Pallet planter and kitchen herb garden in my back garden. Pallets are such a versatile material to work with, although can be a bit tricky to take apart if you don't know how! With so many of them often left lying around just asking to be upcycled, they are very easy to get your hands on cheaply or usually for free (get yourself down to the fruit markets in town there's always loads going spare!)
pallets! Just a couple of examples of many many uses for them. Pallet planter and kitchen herb garden in my back garden. Pallets are such a versatile material to work with, although can be a bit tricky to take apart if you don't know how! With so many of them often left lying around just asking to be upcycled, they are very easy to get your hands on cheaply or usually for free (get yourself down to the fruit markets in town there's always loads going spare!)
With a little bit of love, even the most ordinary and boring can become fabulous!


Custom Furniture Painting - Monk's Bench
It's been a while since I've posted, life has gotten in the way! Usually when my facebook & website pages are quiet, it means I've gotten a commissioned item that I'm working on.
I was asked to paint this beautiful monks bench, which has now gone off to its new home. As you can see from the before picture, it was originally pine in colour.
The client wanted a buttercream colour so I chose Annie Sloan Cream. Annie Sloan paints give a beautiful finish and can be used with a variety of different techniques. The client also asked for a vintage French themed stencil and so I chose the one I thought would suit the piece the best. I chose Annie Sloan Paloma, which is a lovely rich grey with slight purple tones. These colours are fab together. All finished in a clear wax for durability. This was the first time I have applied the wax using Annie's Sloan's wax brush and all I can say is that I wish I had bought one sooner! The application process using one is so much easier than using lint free cloths, makes for quicker working times - which is always a plus in my book! Although a bit pricey, worth every penny.
As with all of my commissions, I try to add an element of surprise to for the client that enhances each piece. I love to use surprise colour pops and did so by painting the inside of the bench and the edges of the sides with Paloma also. The client was delighted with the the result and I've been told has received lots of compliments about it.
The bench has been completely transformed and been given a new lease of life, really happy with how it turned out. If you have something you'd like me to upcycle for you, please get in touch for more details and a quote.
Before
After


T-shirts Re-imagined
Mr Makery has quite a T-shirt collection, when they get worn to death...then I step in!
I LOVE this upcycle. Very cool Electric Picnic t-shirt from 2010 with all the artists on the back and a very striking and colourful stag's head image on the front. I wanted to make something using both sides, so this is what I came up with! A cool way to reuse something that you just can't say goodbye to. If have something you'd like me to upcycle get in touch.
Before:
After:

More Music, Less Talk, More Sitting!
I couldn't resist a play on words (or a couple) for this one!
One of my record stools in the studio of Q102! When I first came up the idea for these stools and made my first protoype, I never could have imagined that they would make their way into the studio of Q102! Thanks to Dave Harrington for getting in touch and for uploading his picture to Q102's facebook page also.
More sitting, less standing! Check out the link below
https://m.facebook.com/dublinsq102/photos/a.361791019903.154794.216559789903/10153521865039904/?type=3&source=57&refid=52&__tn__=E
These stools are sturdier than you'd initially think. Whenever I am at markets/fairs people don't believe me that they are strong enough to take the weight of someone sitting on them - so I always tell them to take a test drive! They are made using very firm upholstery foam, so as well as being solid they are also very comfortable. Please get in touch for more info. They would look great in a home bar or home studio also! :)

Back to Black(board)!
I was asked to make a bespoke blackboard for a client. The brief was for a blackboard that could be wall mounted, big enough to have lots of reminders and notes for herself and her boyfriend and something with geometric prints. The challenge was set!
Made using MDF which was measured and cut to size, I then handmade a frame using some beading from the local DIY shop (which has become my second home at this rate!). The mdf was then painted with blackboard paint and the frame painted in Annie Sloan white chalk paint, with a bespoke mixed teal colour used for the geometric detailing.
For the geometric shapes I made a bespoke design stamp motif from a school eraser and stamped it onto the frame and added some matching with matching blue hooks for hanging keys etc.
There was a little surprise with this one... as I opted for magnetic chalkboard paint, and so they are matching blue magnets attached!! Please excuse the mess of my house in the first few shots, and the pic in its final destination merely highlights the important of keep cheques safe also :)
Delighted with how it turned out, and the client was too so a job well done!
#LookAtThingsDifferently
Custom Blackboard:


