News / Driftwood Effect Floor
Stripped Wooden Floors
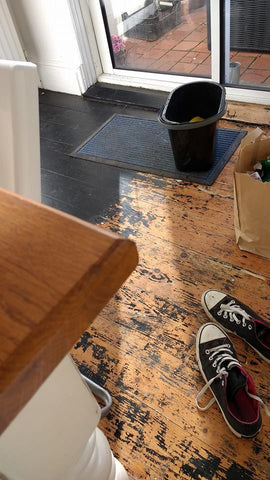
Whenever I've gone quiet on social media and my blog it usually means I'm up to something in my own home. This time is no different! We've had to get works done in the house (damp coursing, fully rewired - the joy of an older house!) so while it was already a mess, I started uncovering this beauty of a floor in my kitchen! I had no idea it'd still be good under all the thick layers upon layers black paint. Lots of work to go, but I do love a challenge! ![]()
We used some fairly potent smelling paint stripper - caution and lots of ventilation and a mask is advised! Our house is an old Victorian redbrick oozing with old world charm and loveliness, however being 120 odd years old, in places the paint is 120 layers thick! This floor was no exception, and again because of it's age we needed to be careful with sanding as there was a risk of old paint containing lead, and being our kitchen floor, with an open shelving style galley kitchen - it would not be a good environment to have tiny lead particles floating around in. I am also fairly sure that the final coating of paint was an industrial style garage floor paint, quite the mess to remove. It was black, layered on until all definition between board was lots and scuffed to bits, never looking clean and very dark in an otherwise bright kitchen. It had to go.
I have always wanted a painted wooden floor, and although my head says to varnish or stain to a darker wooden finish (after all it will help to hide some of that dirt amiright?), alas the heart wants what the heart wants. Painted floorboards are notoriously not as hard-wearing as a good old fashioned varnished one, and although this will be quite a high traffic area I'm still going to give it a whirl. This will only be a temporary solution until we save to get something else, and is our first house after renting for many years so its great to be finally about to do what we want with our own home. Those trusty converse have seen quite a few upcycles in their time! Check back in to see the progress. Wish me luck!
Upcycled Bathroom on a Budget
Finally finished! Before & after....
This has been a true labour of love, I've been redecorating and upcycling my bathroom over the last few weeks. It's taken waaayyyy longer than I would have liked, but a day job, evening job (The Makery!) and life has slowed me down. When we moved in it was an awful shade of green everywhere, and I mean everywhere! It has been transformed into a much calmer space now in comparison and for grand total of about €100 (including buying a new upcycled mirror made from the base of a barrel ![]() ) it just shows you can completely change a room on a shoestring.
) it just shows you can completely change a room on a shoestring.
Mr Makery did and epic job of sanding back the black painted flooring. This was then given a driftwood effect finish using the below technique:
DIY Driftwood Effect Floor:
- Mix 2 parts cream chalk paint to 1 part water & 1 part grey chalk paint (I used Annie Sloan Paloma which gave a mauve tone to the grey) and painted it on like a wash.
- Leave it 24 hours.
- Sand down lightly to bring out the grain in the pine, not too heavily.
- Using a mix of 1 cup white spirits & 2 teaspoons of Rustoleum Multi Purpose in Slate Grey - but you can use any oil based paint. Paint on with a foam brush or even a sponge - dip it into the mixture and rub lightly across the floors with the grain.
The oil paint sticks to the grain and brings out the pattern. I was so amazed at how well it turned out!!! Be warned the white spirits smell is overpowering and gloves are needed but smell goes after 24hrs. I then sealed it all a couple of coats matt varnish for durability. A lot of work but cost very little.
The shelving unit is a ladder I had already which I painted in a soft cream chalk paint, I then used the same driftwood effect as the floor on some plain pine shelves I picked up for next to nothing with colour pops inside to help lift and add a bit of life to the space. All the bit and pieces have been collected along the way from family and flea markets and help to give it that homely feel. Delighted with how it turned out. Now to tackle the rest of the house! :)
Bathroom Before


Sanded Floor:


Floor Before & After:

Bathroom After:


